It’s time to learn how to give your Apple iPhone SE a fresh new coat of paint with a factory reset. If you’re selling your device or transferring ownership, or if your phone is having issues, a factory reset may be the solution.
It will wipe all data in Apple iPhone SE and return the software to its original state, as it was when you first turned it on, just like it were brand new, fresh from the factory’s oven. Also, performing a hard reset using iTunes can be a solution reset the Apple iPhone SE if the operation can’t be done from the phone settings.
This guide focuses on factory resetting Apple iPhone SE running the last version of iOS. It’s important to note that the process may vary for older iOS versions due to differences in the user interface. That’s why you should always pay careful attention to all the instructions, no matter how simple or basic they may seem.
Be careful! Proceed with caution
First things first: let’s get the disclosure out of the way. Performing a Apple iPhone SE factory reset will delete all your data and get the software back to its original state. This means all apps and data stored on your device will be deleted.
Make sure to back up all critical files and data before proceeding, because there will be no turning back once the process is complete. Also it is recommended to remove all accounts, particularly your iCloud account and to turn off Find my iPhone. This will prevent any issues with Activation lock.
Try to search for other options before resetting your Apple iPhone SE
Starting fresh can be a real pain, as the backup process is complicated and re-downloading all your data takes time, especially if you’re not on Wi-Fi and especially if you’re not a tech-savvy person.
Before you reset the Apple iPhone SE, consider finding a simpler solution by checking our tutorials for fixing Apple iPhone SE. If that doesn’t work, try a restart or a Soft Reset (hold Power and Volume Down), which won’t erase your data.
If you have tried all other options and need to reset your phone, continue reading. Trust us, you’ll get the desired results in no time.
Factory reset Apple iPhone SE using Settings menu
If you’ve decided to factory reset Apple iPhone SE, the simplest way is through the Settings app:
How to factory reset a Apple iPhone SE phone using the settings:
- Charge your phone or make sure it has enough battery to complete the process.
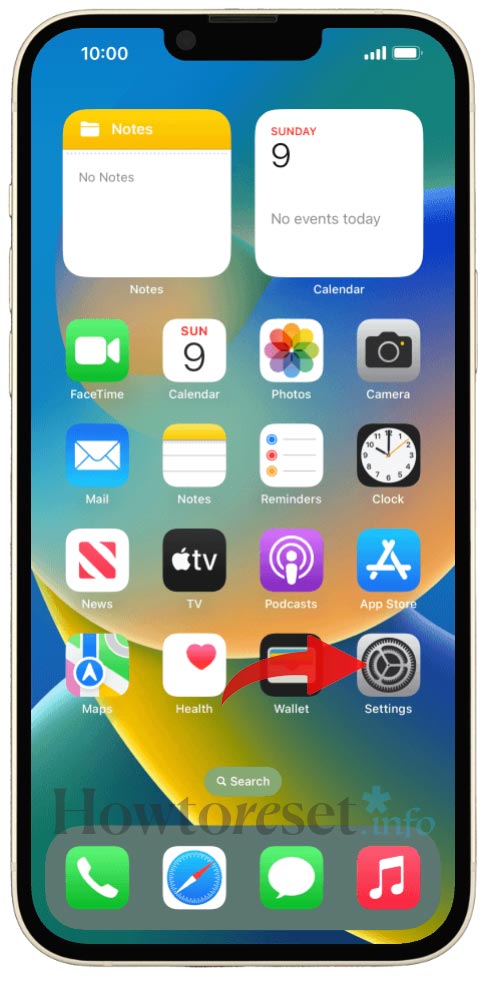
- Locate and open the Settings app.

- Choose General.
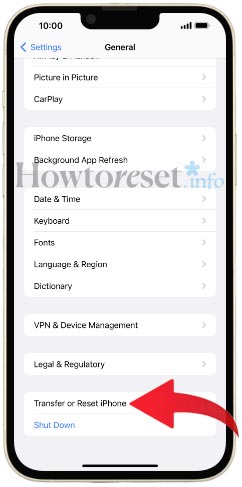
- Select Transfer or reset iPhone.
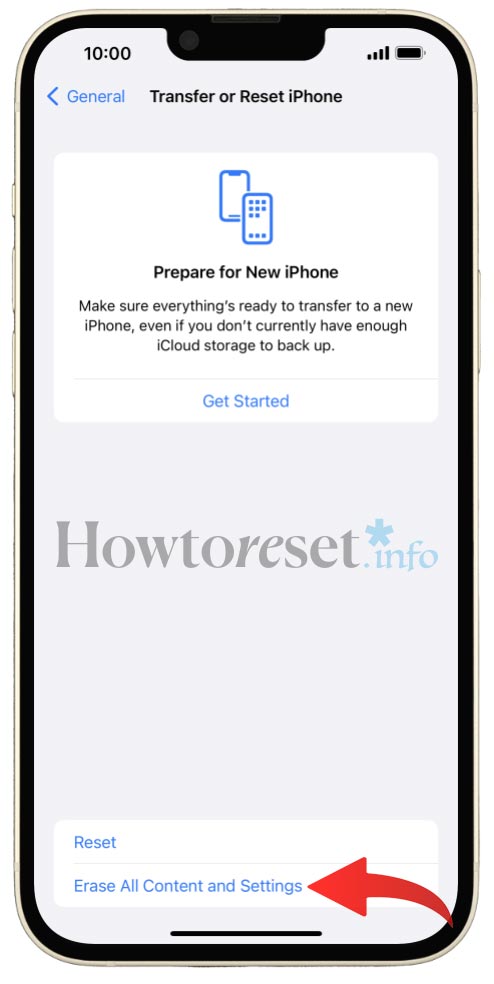
- Go to Erase all content and settings.

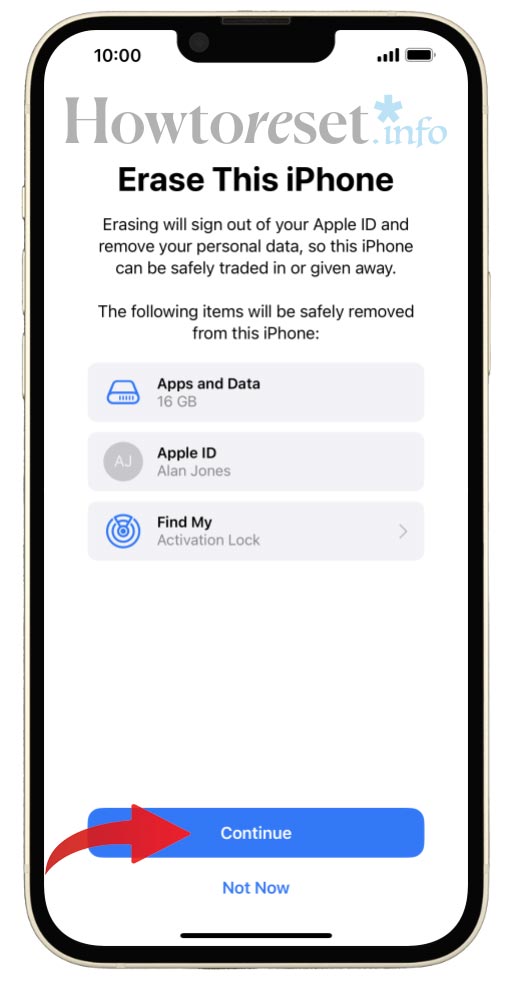
- Tap Continue.

- Enter the Passcode if required

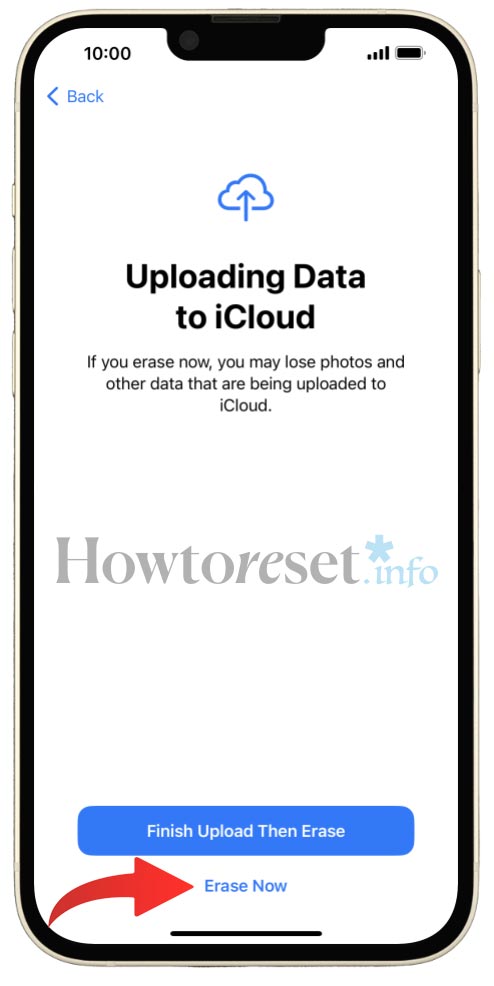
- Press Erase Now.
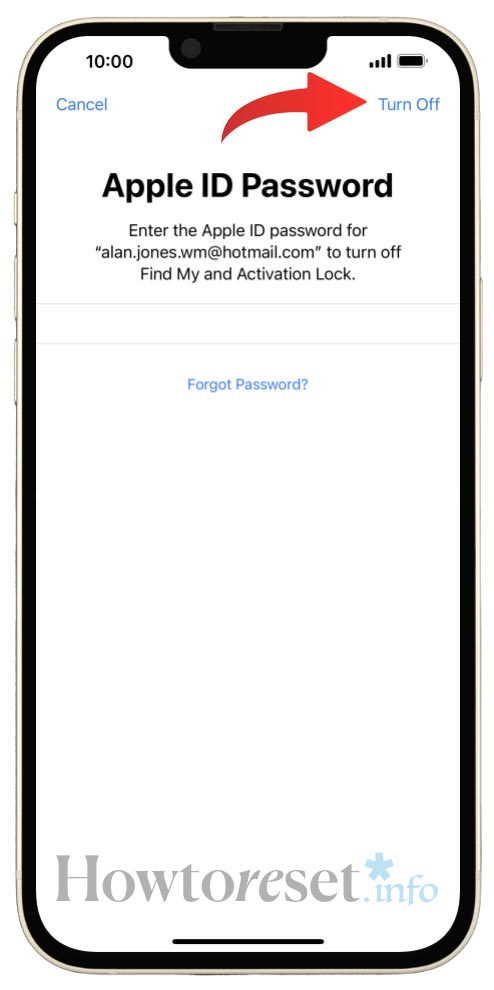
- Final step, type in your Apple ID password and press Turn off.


Hard reset Apple iPhone SE using a computer.
Sometimes, due to malfunction, users report they can’t access the Apple iPhone SE’s settings. Luckily there’s a way to reset using a computer, a method known as Hard Reset. This can be done using iTunes on Windows or directly from Finder on Mac.
How to hard reset Apple iPhone SE phone using iTunes on Windows:
- Plug your Apple iPhone SE device into computer with a working cable, and open iTunes.
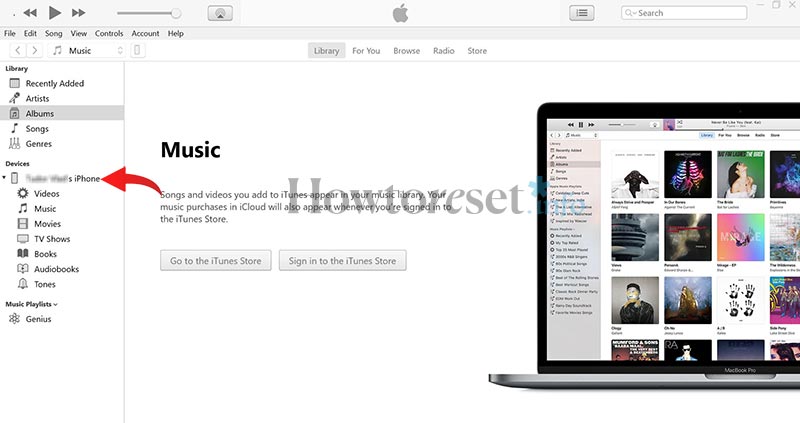
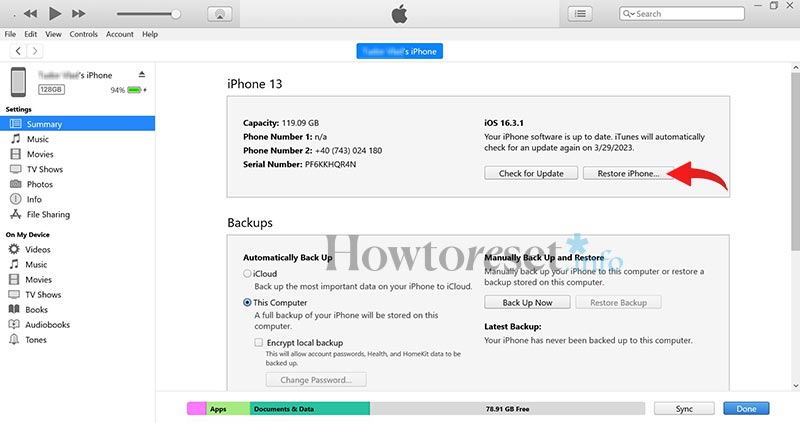
- Locate and select your device in iTunes from the left menu.

- Select Restore iPhone.
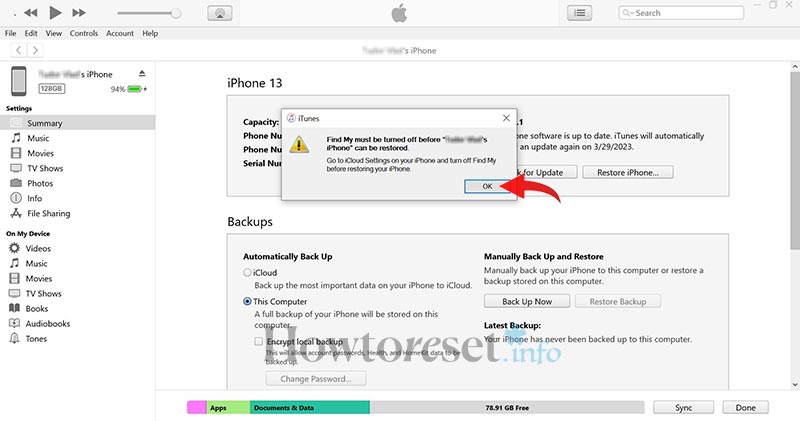
- Make sure to turn off Find My iPhone or else you won’t be able to proceed to the next step.
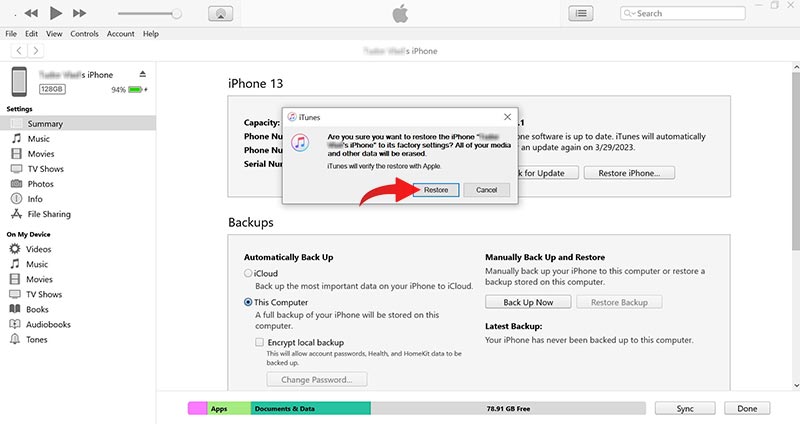
- When asked, select Back Up if you want to back up the Apple iPhone SE before restoring your phone and erasing all the data; or click Don’t Back Up to move onto the next step.
- Finally, hit Restore to begin restoring your Apple iPhone SE to factory state.

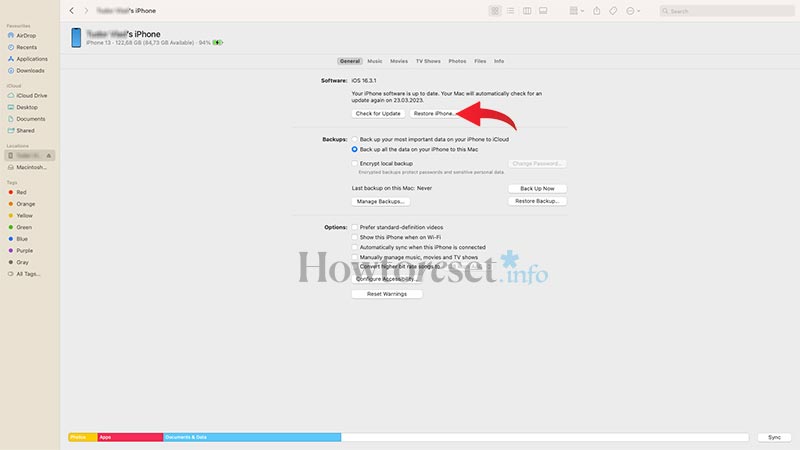
How to hard reset Apple iPhone SE phone on Mac:
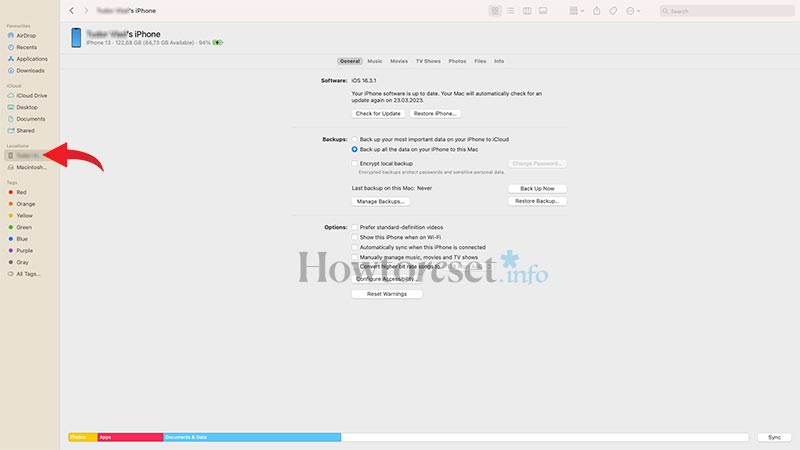
- Plug your Apple iPhone SE device into computer with a working cable, and open Finder.
- Locate and select your device in Finder from the left menu.
- Select Restore iPhone.
- Make sure to turn off Find My iPhone or else you won’t be able to proceed to the next step.
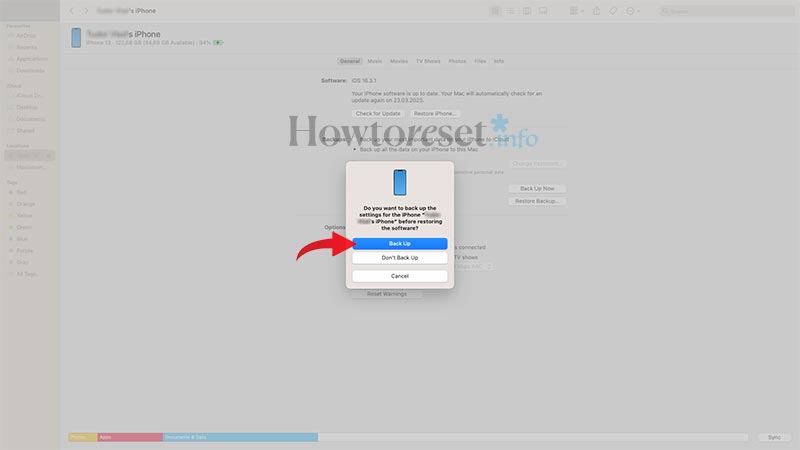
- When asked, select Back Up if you want to back up the Apple iPhone SE before restoring your phone and erasing all the data; or click Don’t Back Up to move onto the next step.
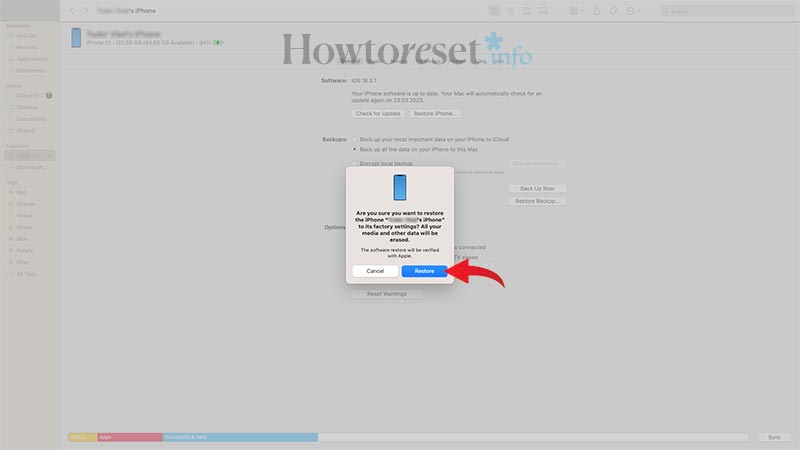
- Finally, hit Restore to begin restoring your Apple iPhone SE to factory state.
FAQ
Does a factory reset on a Apple iPhone SE remove malware, viruses, and other harmful software?
Typically, yes. Factory resetting your Apple iPhone SE will return it to its original software state, effectively removing viruses, malware, and other harmful software. However, exceptions may exist, such as in the case of a rooted phone where malware can be coded into the system and persist even after a full wipe.
Do I need to download all my apps and files again after a Apple iPhone SE factory reset?
Yes, you will need to. But there are backup tools available to simplify the process for your Apple iPhone SE.
Does factory resetting a Apple iPhone SE bypass security measures?
In some cases, a factory reset may erase all information and make stolen or lost phones vulnerable. However, Apple has implemented stronger security measures, requiring a passcode, Apple ID password, or identity confirmation even after a factory reset.
Do I need to update my Apple iPhone SE after a soft reset?
No, after a factory reset, the phone will revert to the latest software version, not the original version it came with.


If you found this helpful, Like it on Facebook or follow us on X and Instagram