It’s time to learn how to give your Nokia G11 Plus a fresh new coat of paint with a factory reset. If you’re selling your device or transferring ownership, or if your phone is having issues, a factory reset may be the solution.
It will wipe all data in Nokia G11 Plus and return the software to its original state, as it was when you first turned it on, just like it were brand new, fresh from the factory’s oven. Also, performing a hard reset using Recovery Mode can be a solution to bypass screen lock on Nokia G11 Plus.
This guide focuses on factory resetting Nokia G11 Plus. It’s important to note that the process may vary for different devices and Android versions due to differences in the user interface and button combinations. That’s why you should always pay careful attention to all the instructions, no matter how simple or basic they may seem.

Be careful! Proceed with caution
First things first: let’s get the disclosure out of the way. Performing a Nokia G11 Plus factory reset will delete all your data and get the software back to its original state. This means all apps and data stored on your device will be deleted.
Make sure to back up all critical files and data before proceeding, because there will be no turning back once the process is complete. Also it is recommended to remove all accounts, particularly your Google account. This will prevent any issues with FRP (Factory Reset Protection), which requires the original Google account or PIN code when resetting the device.
Try to search for other options before resetting your Nokia G11 Plus
Starting fresh can be a real pain, as the backup process is complicated and re-downloading all your data takes time, especially if you’re not on Wi-Fi and especially if you’re not a tech-savvy person.
Before you reset the Nokia G11 Plus, consider finding a simpler solution by checking our tutorials for fixing Nokia G11 Plus. If that doesn’t work, try a restart or a Soft Reset (hold Power and Volume Up until the screen turns off), which won’t erase your data.
If you have tried all other options and need to reset your phone, continue reading. Trust us, you’ll get the desired results in no time.
Factory reset Nokia G11 Plus using Settings menu
If you’ve decided to factory reset Nokia G11 Plus, the simplest way is through the Settings app:
How to factory reset a Nokia G11 Plus phone using the settings:
- Charge your phone or make sure it has enough battery to complete the process.
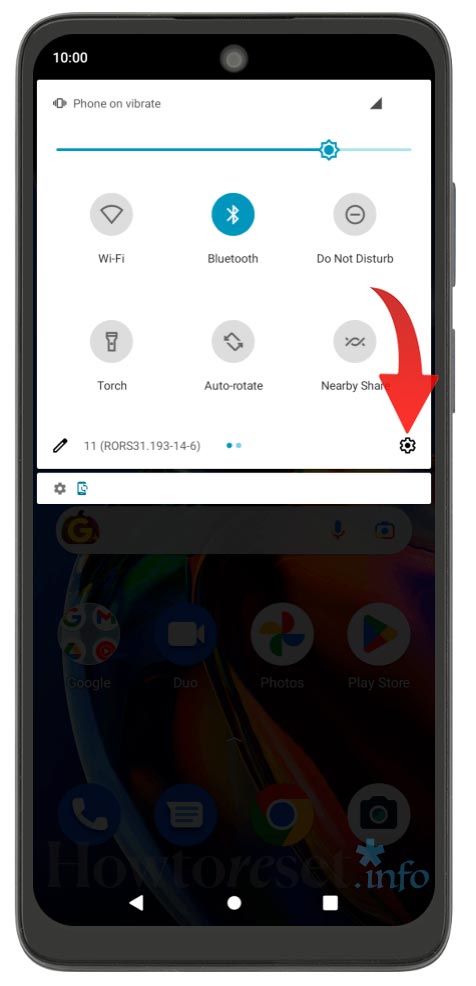
- Swipe down from the top of the screen and tap the Settings icon.


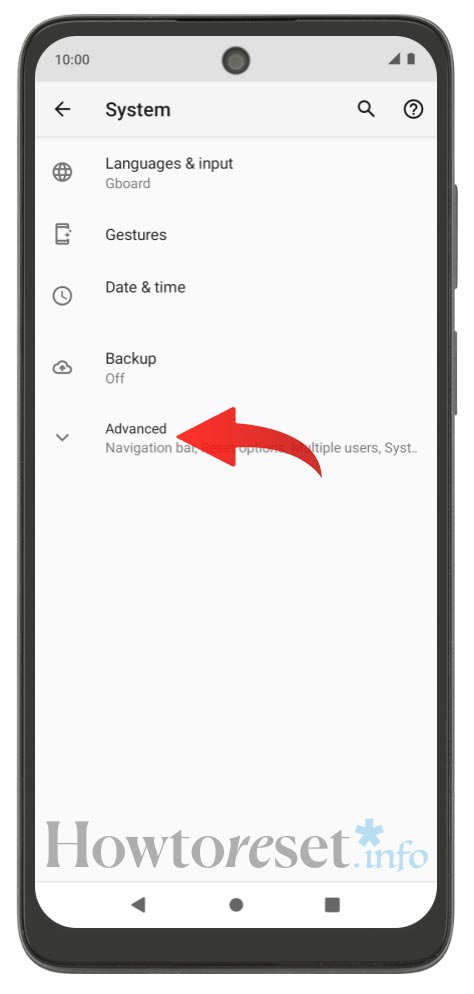
- Choose System.

- Go to Advanced or directly to Reset options.

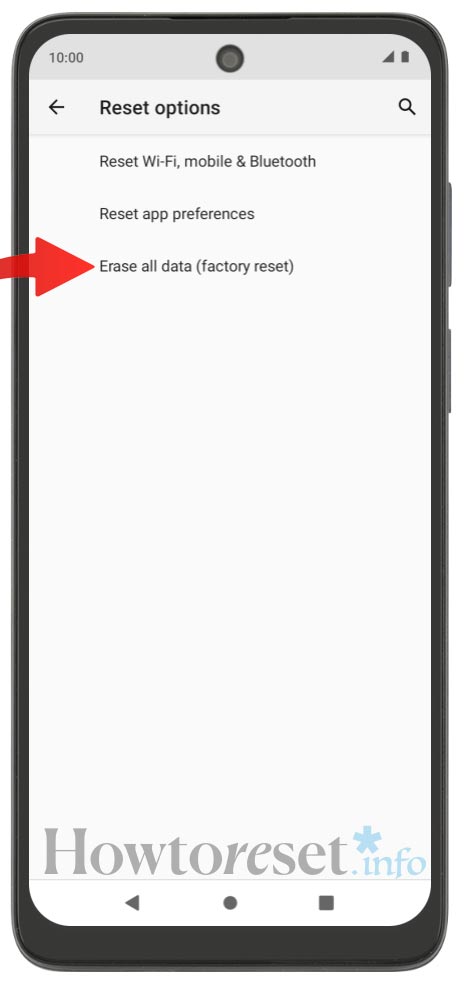
- Tap Reset options.

- Scroll down and tap the Erase all data (factory reset) button.

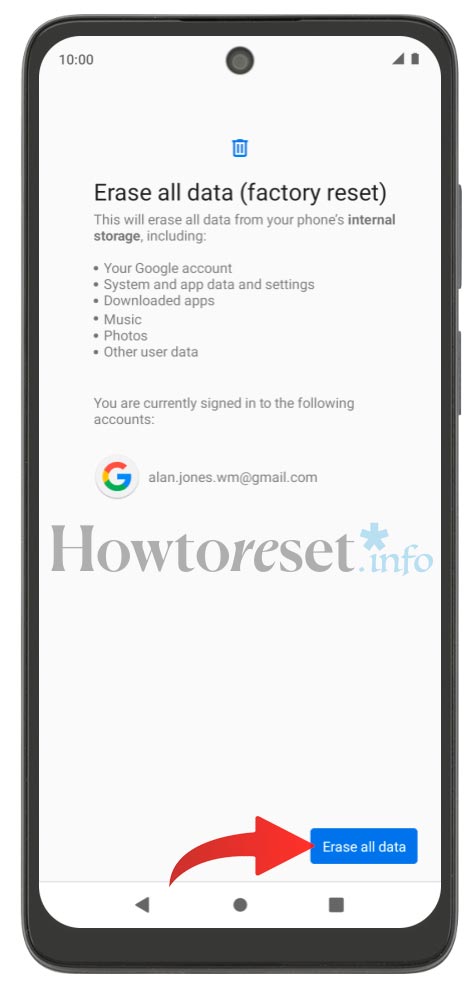
- Press Erase all data or Delete all data and wait for the phone to erase all data.


Hard reset Nokia G11 Plus via the Recovery Mode.
Sometimes, due to malfunction, users report they can’t access the Nokia G11 Plus’s settings. Luckily there’s a way to reset through Recovery Mode, a method known as Hard Reset. This can effectively resolve issues that a regular factory reset couldn’t fix.
How to hard reset a Nokia G11 Plus phone using Recovery Mode:
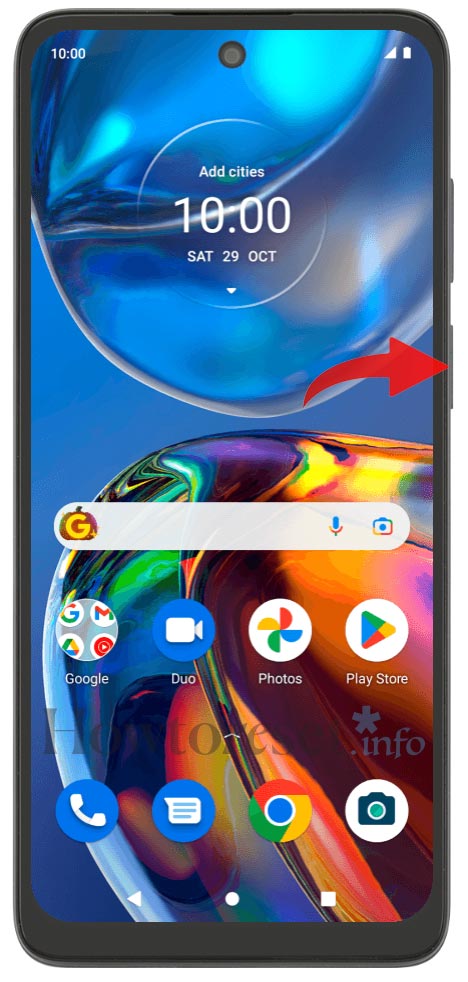
- Turn off your Nokia G11 Plus. You can do this by pressing the Power button.

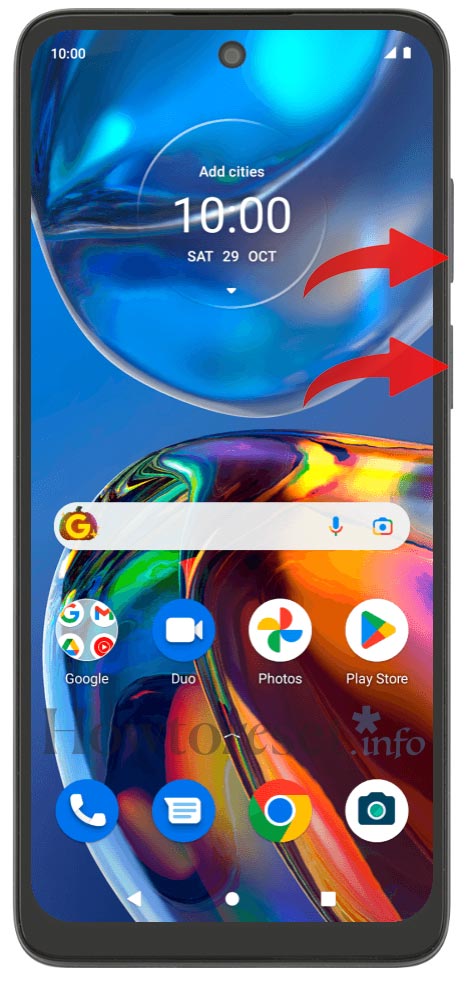
- Press and hold down the Power and Volume Down buttons at the same time.

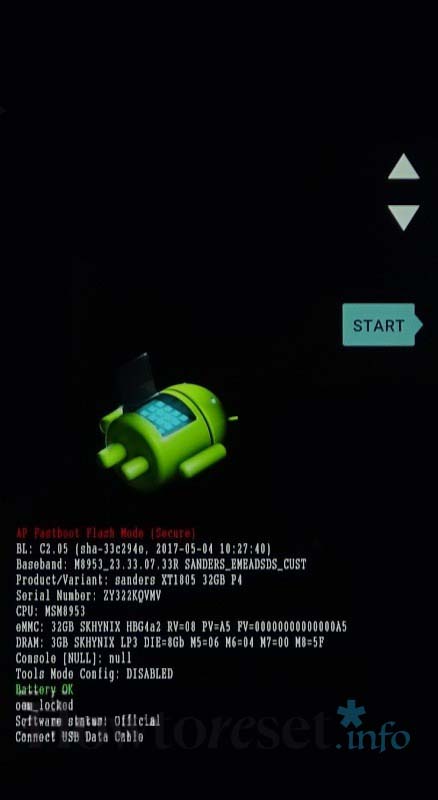
- Keep holding until you see the screen with a Start arrow pointing towards the Power button. Now release the buttons.

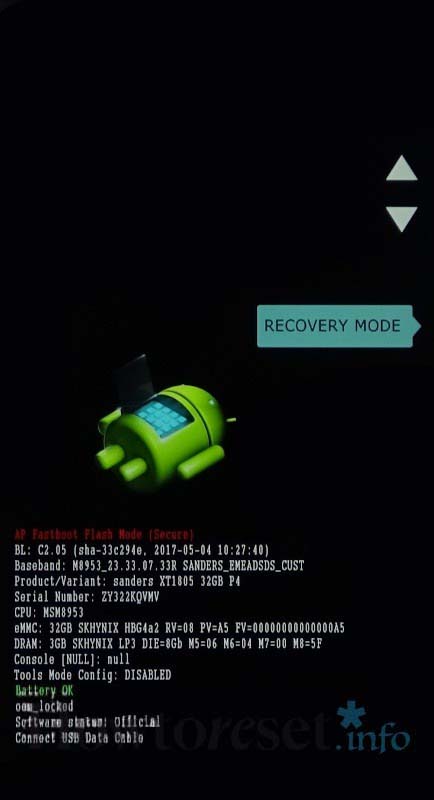
- Use the Volume buttons to navigate.
- Go down to Recovery Mode and and press the Power button to select it.

- Your device should reboot, and an Android robot picture with "No Command" message will be displayed on the screen. Hold the Power and Volume Up buttons in order to enter the device’s recovery mode.


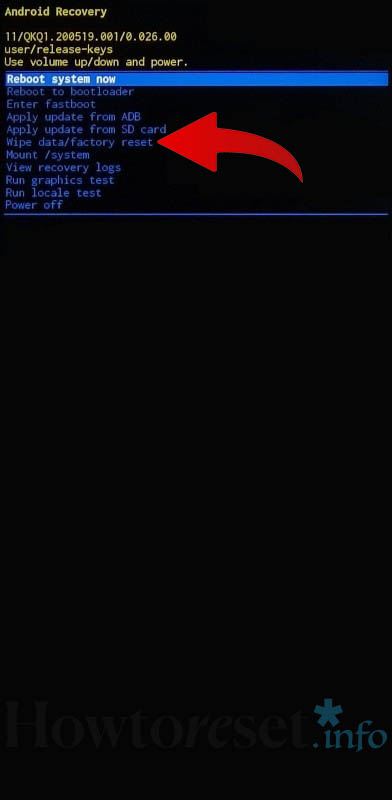
- With the Volume buttons, go down to Wipe data/factory reset.
- Press the Power button to select it.

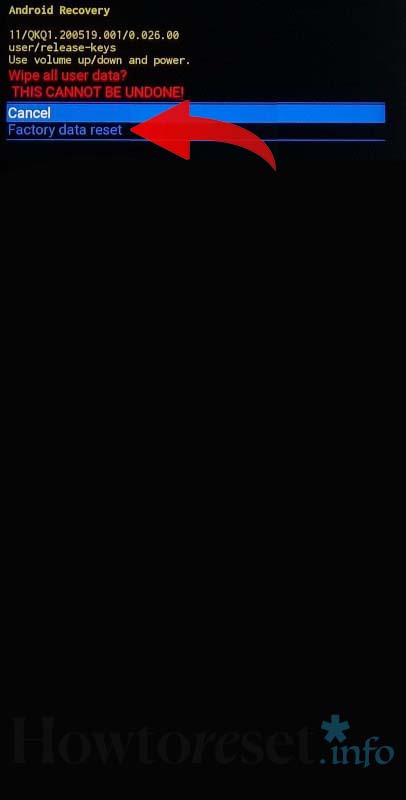
- Confirm the factory reset by choosing Factory data reset.

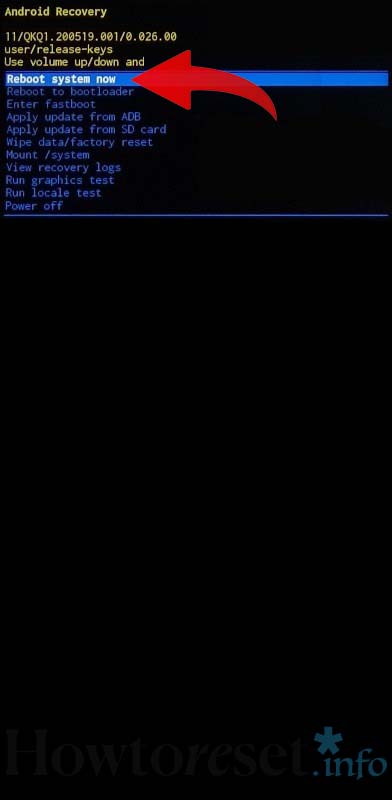
- After the reset is complete, select Reboot system now.

FAQ
Does a factory reset on a Nokia G11 Plus remove malware, viruses, and other harmful software?
Typically, yes. Factory resetting your Nokia G11 Plus will return it to its original software state, effectively removing viruses, malware, and other harmful software. However, exceptions may exist, such as in the case of a rooted phone where malware can be coded into the system and persist even after a full wipe.
Do I need to download all my apps and files again after a Nokia G11 Plus factory reset?
Yes, you will need to. But there are backup tools available to simplify the process for your Nokia G11 Plus.
Does factory resetting a Nokia G11 Plus bypass security measures?
It depends on the specific phone and Android version on the Nokia G11 Plus. In some cases, a factory reset may erase all information and make stolen or lost phones vulnerable. However, manufacturers such as Samsung and LG are implementing stronger security measures, requiring a password, PIN, or identity confirmation even after a factory reset.
Does a factory reset erase data on an SD card?
No, a factory reset only wipes data in the phone’s internal memory. To erase content on an SD card, you will need to format it.
Do I need to update my Nokia G11 Plus after a soft reset?
No, after a factory reset, the phone will revert to the latest software version you installed, not the original version it came with.










If you found this helpful, Like it on Facebook or follow us on X and Instagram